You are here: Forks > 32 mm > F-SERIES > FRL Remote Setup Guide

Remote RL Fork Setup Guide

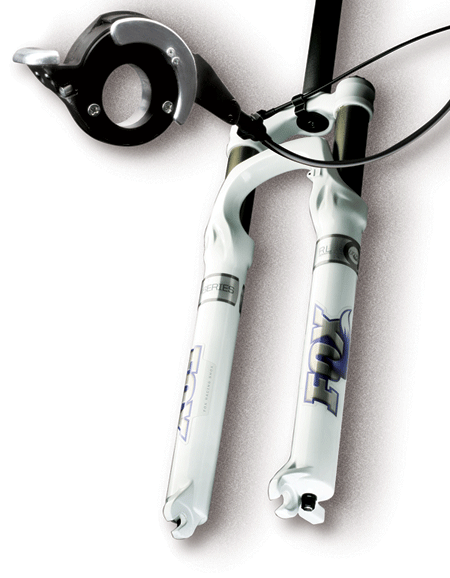
Figure 1: FOX F-RL Remote Fork

Installing Your Fork

(F-RL Remote)
  1. Remove the fork from all packaging. Be careful not to kink the control cable.
  2. See Installing a 32 mm Fork for the instruction procedures for installing a 32 mm fork. Proceed to install the fork steerer into the head tube of the bicycle.

Install and Orient the Shimano Actuation Lever

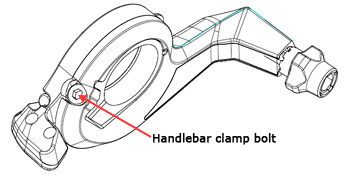
  1. With a 3 mm hex key socket, loosen the handlebar clamp bolt on the underside of the Shimano Lockout Lever Assembly (LLA).

    Figure 2: Location of Handlebar Clamp Bolt
  2. Remove the right-hand grip from the handlebar.
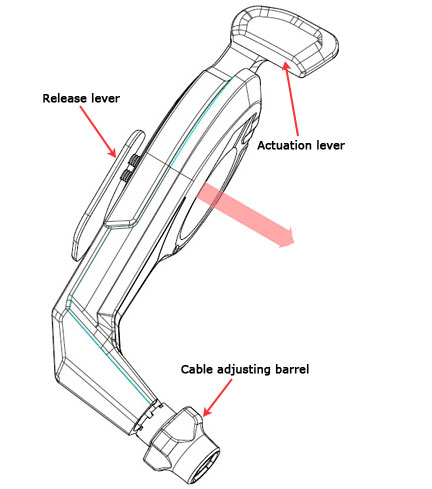
  3. Slide the Shimano LLA onto the handlebar, in the direction shown in Figure 3: Positioning the Shimano LLA. The LLA orientation should be so that the release lever is facing towards the end of the handlebar, and the cable adjusting barrel is pointed towards the front of the bike, above the hand brake lever assembly. Re-install the handlebar grip into its original position.

    Figure 3: Positioning the Shimano LLA
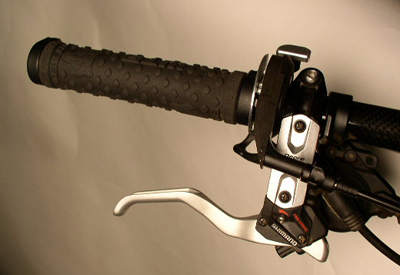
  4. Position the Shimano LLA so that it abuts the inner end of the grip, however be sure the grip does not interfere with the normal operation of the lockout release lever.

    Figure 4: Shimano LLA Installed on the Handlebar
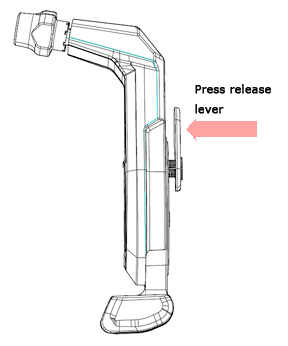
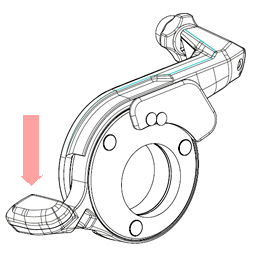
  5. Push the actuation lever down to its locked-out position, as shown in Figure 5: Pressing Down the Actuation Lever.

    Figure 5: Pressing Down the Actuation Lever
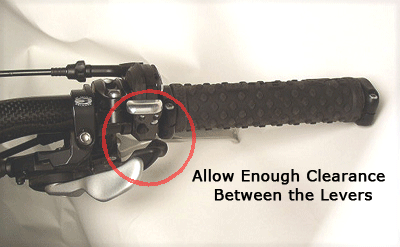
  6. Rotate the Shimano LLA, so the actuation lever in its locked out position does not interfere with normal thumb operation of the rear derailleur shifter; see Figure 6: Actuation Lever and Thumb Shifter Clearance.

    Figure 6: Actuation Lever and Thumb Shifter Clearance
  7. With a 3 mm hex key socket, torque the handlebar clamp bolt to seven (7) in-lb; see Figure 2: Location of Handlebar Clamp Bolt.

    CAUTION:  For carbon handlebars, it may be necessary to slightly decrease the tightening torque, to avoid causing any damage to this type of handlebar. Consult the bicycle or handlebar manufacturer documentation regarding the appropriate level of tightening torque for carbon handlebars.

  8. Press the release button to return the Shimano LLA to the unlocked state, as shown in Figure 7: Shimano LLA Release Lever.

    Figure 7: Shimano LLA Release Lever

Test the Proper Functioning of the Remote Lockout

  1. Install the wheel into the fork, per the manufacturer's assembly instructions.
  2. With the Shimano LLA in unlocked position, compress the fork two inches into the travel and release ten times to ensure the open-bath lockout damper is full of oil.
  3. Press the lockout lever down, until you feel it click to engage the lockout position.
  4. Push down on the handlebars and release, to check whether the fork is locked out.
  5. If the fork is not locked out, rotate the cable adjusting barrel on the Shimano LLA counter-clockwise ¼ turn. Push down on the handlebars to compress the fork, to test the lockout function. Repeat this step as necessary, until optimum lockout is achieved.

WHEREVER YOU RIDE. WHEREVER YOU RIDE.


Bushing Technology & Inspection | Seals & Foam Rings | Control Direction | Oil Volumes | Structural Inspection | Dropout Thickness Inspection | Torque Values | Unit Conversion | Suspension Tuning Tips | Using the Pump | Important Safety Information | Service Intervals | Contact FOX Service | Warranty Information | FOXHelp Service Web Site


Copyright © 2010
FOX Factory Inc.